This article will teach you how to start a Shopify free trial. And you will learn how to register and create an account, add your first product, and then edit your store’s style. Also, you will know how to connect a domain to your e-commerce store and then set up payment processors to receive payment from your customers. So what is Shopify? Shopify is a full commerce platform that enables you to start, grow, and operate a business. All you need to do is visit the website to create and customize your online store and start selling in multiple places. You can sell on the web, mobile, social media, online marketplaces, on brick-and-mortar locations, and by pop-up shops. Besides, Shopify is fully cloud-based and hosted.

The effect of being hosted will have on your business is that you don’t have to worry about upgrading or maintaining software or web servers. Also, Shopify gives you access to run your business from anywhere as long as you have an internet connection. Besides, you can start your initial shop using the Shopify free trial at no cost as it does not ask for your credit card information. And after your trial expires, you can select a pricing plan that fits the size and growth phase of your business. Therefore without any delay, let me show you the steps you need to follow to start Shopify free trial.
Steps to begin Shopify free trial
- Visit the Shopify homepage.

- And click on start your free trial
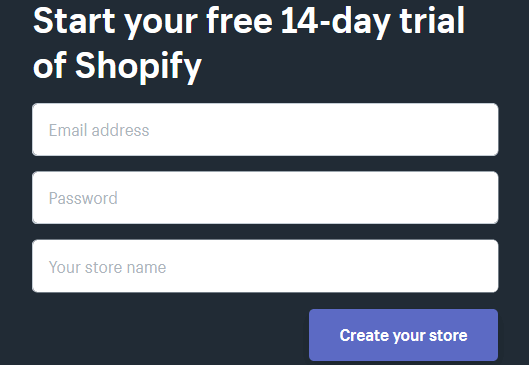
- In the form that you will see on the new page, enter your email, password and store name and click on create your store.
- Next answer a few questions about yourself and the store you are trying to set up. After answering those questions click on the next icon.

- Then enter your name, address and phone number you will use to get payments. Also, click on “enter my store” to begin to add products to your brand new store.
- These are the initial steps to get Shopify free trial.
Add Products
- Once you sign in to your store, you will see add your first product. So look to the top left tab and you will see add product.
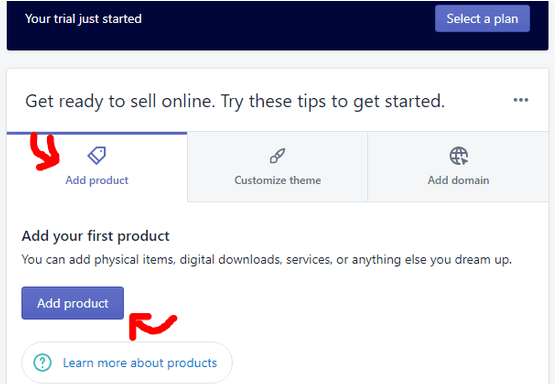
- Also, look below and click on the add product tab.
- Next, fill the needed information about this product you are adding to your store. There are options like add title, features, availability, images, description and so on.
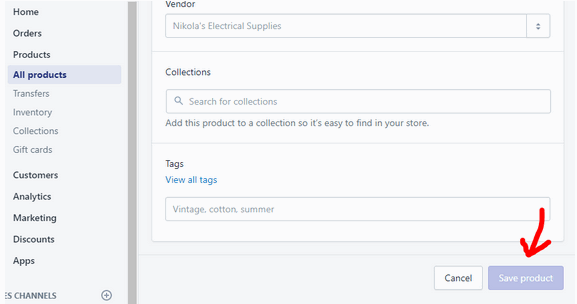
- once you complete that form scroll down and enter more information like product pricing, SKU numbers and quantity and so on.
- And to save your work, click on the save product icon located at the bottom right side of that page.
- These are further steps to get the Shopify free trial
Edit style of the Shopify free trial store
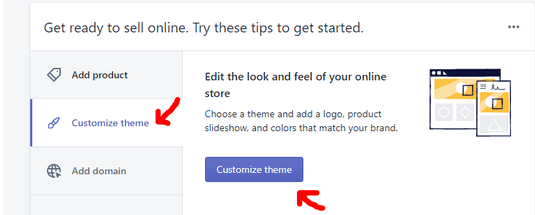
Click on the customize tab and then click on the customize theme to start. You have total freedom to change your store look and feel.
- Go on and add Header Image and some Texts.
- Use the free theme and Images there to do it.
- You can also change the colour, fonts, text style, and so on.
Next, Connect Your Domain to your store
At this level, you have already created an account, added your first product, and designed the look and feel of your online store. What you do next is to link this new Shopify store to a domain so that customers can find the store page.
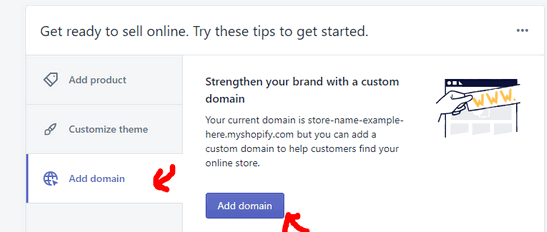
- So go to your personal Shopify Dashboard again and click on the last tab that says “Add Domain”
- This stage demands you Link either your existing domain (website address) or buy a new domain. Click the option that concerns you and follow the onscreen instructions to link the domain.
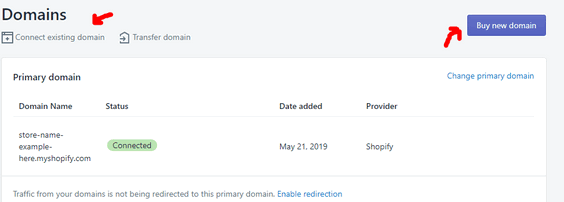
- But in this tutorial, I will discuss linking or connecting the shop to an existing domain.
- So click on the Connect button.
- Then you will receive a prompt requesting that you enter website information. So type in your website address and click continue to link your Shopify store to your website.
- After doing that, you will see your domain on your Shopify store domain page.
- That is how to connect your domain to your store for Shopify free trial.
Finally, Set Up Payments
This is the last stage of setting up your Shopify free trial. You have to create your store’s payment processing system.
- To start setting it up, look at the left bottom part of your Shopify page and Click on the Settings Icon.
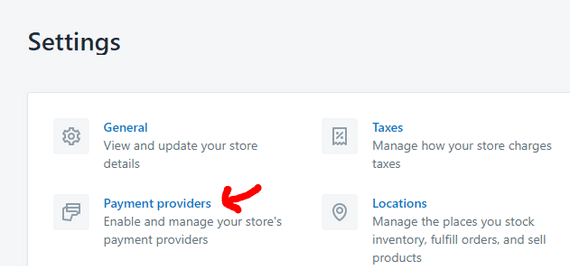
- Next, click on Payment providers. So choose out of the popular payment providers. You may choose PayPal or Stripe. (Note that Stripe is able to handle credit card payments while Paypal can process transactions if your buyers wish to use PayPal.)
- Also, under the Shopify payment options click on Complete Account Setup if you want to start accepting credit card payments.
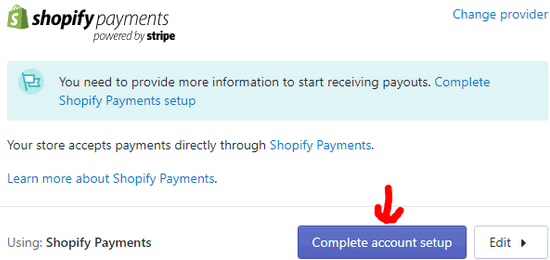
- Then fill in accurately different information about your business. Also, you can modify how your billing information looks to your customers during this account setup.
- And lastly, type in your bank account Information to let Shopify deposit payment into it when the time comes.
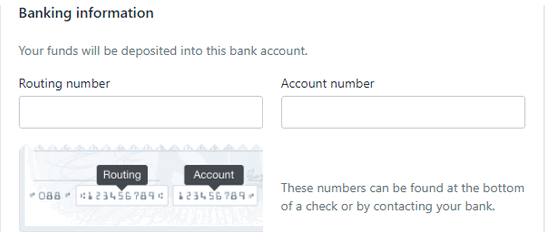
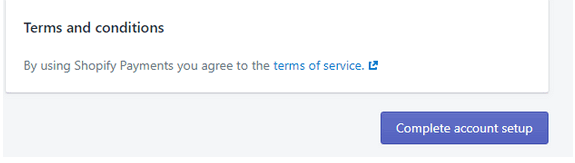
- Also, enter your Routing Account Number and read through the terms of service before you click on the Complete account setup button at the bottom right part of the page.
- At this point, you have completed setting up the payment processing system and you now have a fully functioning e-commerce store.
- And at last, you can begin your Shopify free trial.
Conclusion
In this article, I explained the steps you need to follow to start Shopify free trial. To begin, visit the Shopify trial page and register to create an account. Next, add your first product, and then edit your store’s style. Also, you have to connect a domain to your e-commerce store and then set up payment processors to receive payment from your customers. That is how to start your free trial. It runs for 14 days. After it expires you may buy a plan that fits your level of business. Try it now.
Related: